Showing posts with label Southern Cooking. Show all posts

Wednesday, January 8, 2014

Old Fashioned Scratch Biscuits


Homemade biscuits are one of my favorite breakfast items, next to bacon that is, and frozen and canned biscuits just don't cut the mustard, for me anyway. Biscuits are one of those things that are very easy to make, as well as, very easy to mess up. So I thought I'd begin the recipe with what not to do.

Here are the most common mistakes people make when preparing biscuits:

• If you don't add enough shortening or enough baking powder or if you use old baking powder, you'll notice that your biscuits take forever to brown and they will be hard or tough.

Note: Never use old baking power, as it looses it potency. You can freeze your baking powder to make it last longer. By old Baking Powder, I mean the container has been opened for more than 2 months.

• If you add too much shortening, your biscuits will be crumbly.

• If you knead the dough, your biscuits will not rise properly and will be hard or tough. 

Now that you know what not to do, you can begin the recipe with the confidence they will turn out great. 

Note: The reason some ingredients say Approximately is because making biscuits is as much an art as it is technique and exact measurements of some ingredients just can't be done, as environmental influences, like humidity, can effect the proportions.

Note: These biscuits reheat very well, either by cutting in half and using a toaster or in a toaster-oven. You could even use your big oven, but that seems like a lot of trouble to heat 1 biscuit.

Note: You can make the biscuit dough in large batches, cut your biscuits out, place them on a greased cookie sheet, and freeze them off. Once frozen, the biscuits will pop right off the cookie sheet, because we greased it, and put them in freezer bags. When your ready to cook them, you can go right from the freezer into the oven. Believe me, your homemade frozen biscuits are 1000 times better than any store bought biscuit. So, get the family together and have a biscuit making day, then enjoy fresh biscuits at breakfast or dinner for weeks.


Note: Remember, ingredients to this recipe are cheap so it is cheap to practice. Varying the proportions of the ingredients change the texture of the biscuits. So practice until you get a feel for how to make the type of biscuit you like. 

Note: As always  feel free to play with the recipe and make it your own. You can add shredded cheddar cheese or some goat cheese and bacon bits. You can add a cup of sugar and you'll get shortbread, then just add some strawberries and bam, the breakfast of champions. You get the idea, get creative.


Makes about 10 large biscuits

Skill Level: Beginner

Prep time 10 minutes, or less.

Ingredients:
  • Approximately 2 Cups of All Purpose Flour
  • 2 Level Teaspoons Baking Powder
  • 1 Heaped Teaspoon Kosher Salt
  • Approximately ½ Cup Shortening (Note: For some reason, the cheaper the shortening, the better the biscuits. You can also use Lard.)
  • Approximately ½ Cup of Whole Milk or Buttermilk
  • 1 Heaped Teaspoon Sugar (optional)
  • ½ Stick of Melted Unsalted Butter

Tools needed:
  • Large Cutting Board
  • Chef's knife
  • ½ Sheet Pan or Cookie Sheet
  • Measuring Spoons
  • Bench Scraper
  • Brush
Pre-Heat Oven to 450 Degrees


Scoop out your baking powder.

Note: If you ever wondered why the opening to baking powder containers are not round, it is because you use the flat side to "Level" your spoons. Pretty ingenious if you ask me.


Add all the dry ingredients into a 1 gallon sealable bag and shake and manipulate until the contents are thoroughly mixed.

Note: You could also accomplish this in a bowl with a whisk, but I like to use a bag, because then I have a pre-floured freezer bag to freeze off the biscuits I'm not immediately going to use.


Pour the dry ingredients onto a cutting board and make a ring, with walls high enough to contain liquid.


Add the shortening and some of the milk.


Using one finger, begin circling around at the edge of the wall, dragging small amounts of flour into the milk.

Note: be carful not to damage the integrity of the wall by getting to enthusiastic or you'll release the liquid all over your counter.


Note: You do not want the shortening to become homogenized. You want small lumps to remain in the finished dough. This helps leaven the biscuits and makes them light and fluffy.


The process continues and as the milk is absorbed, you add more.


If your ring gets to spread out, you can use a bench scraper, or in my case a flat wooden spoon, to nudge your flour ring to a smaller diameter.

Note: Do note add too much milk. You want to add just enough to bring the dough together. It is better to leave flour on the cutting board and have a smaller ball of dough, than add to much liquid where more flour would have to be kneaded in.


Once all the milk has been added, use your bench scraper to gently crate a ball of dough.

Note: DO NOT KNEAD the dough as you want to leave shortening lumps throughout.

Note: Dough should be moist, but not sticky to the touch.


Once your dough is made, you can cut into even pieces with a chef's knife. You can spend time making your biscuits perfect and round, but I like to leave mine rustic and handmade looking.


Dip some shortening out on a paper towel.


Use to grease the sheet pan.


Place biscuits on the highest rack in your oven. This will help ensure the bottoms of the biscuits don't burn before the tops are golden brown.

Bake about 10-12 Minutes.


About 2 Minutes before the biscuits are done, I like to brush my biscuits with some melted, unsalted butter.

Enjoy.


Friday, September 6, 2013

Chunky Pecan Chicken Salad Recipe

Served on Toasted Wheat
This is the 4rd meal in a series of recipes that were derived from one another, but this time, instead of using leftovers, we are going to use the rest of the chicken meat from the Chicken Stock and Consommé recipe. Within this series, we have made 4 meals, for 2 persons, from a single chicken. This is why doing a series of meals in this fashion, not only makes preparing meals easier, it can also be friendlier to your wallet.

Feel free to play around with this recipe and make changes to suit your tastes. For example, you could add curry, change the pecans to walnuts, and add some white raisins and have a Curried Chicken Salad. You could add apples and cashews instead of grapes and pecans. You could use a food processor to pulse grind the meat for a smoother style chicken salad. You could use smoked chicken, mayo, mustard, onions, celery, and some BBQ spices and have a Smoked Chicken Salad. You are only bound by you imagination. 

Note: It is important to realize that these recipes are merely guidelines to follow. They'll taste great as they are, but I encourage you to play with them and make the recipes your own.

Note: It is good practice to read the entire recipe, while paying particular attention to the "Notes", before you try to make the dish, as there are often subtleties that can be easily overlooked, which sometimes, can make all the difference in the world for the outcome. 

ingredients for chicken salad
Makes 4 Sandwiches

Skill Level: Beginner
Prep time 10 minutes, or less.

Ingredients:
  • ½ cup chicken (roughly 1 breast and 1 thigh)
  • ½ cup celery, small dice
  • ¼ cup yellow or Vidalia onion, small diced
  • ¾ cup red seedless grapes, cut in ½
  • ½ cup toasted and salted pecan halves, lightly chopped
  • ½ cup mayonnaise 
  • ¼ cup sour cream
  • 1 tablespoon yellow mustard
  • 1 tablespoon lemon juice
  • ¼ teaspoon kosher salt
  • ¼ teaspoon pepper

Tools needed:
  • 1 medium bowl
  • Chef's knife
  • 1 rubber spatula for stirring

dice chicken


Large dice the chicken meat.
toasting pecans


In a sauteuse pan, heat a tablespoon of olive oil and add the pecan halves and a ½ teaspoon of salt. Using medium to high heat, toast the pecans, flipping them often, to keep them from burning.
chopped toasted pecans
 When the pecans have toasted, place them on a cutting board and lightly chop.

Note: I toast the pecans whole and then chop them, instead of the other way around. I do this for two reasons: a) if you chop them ahead of time, you will have pieces of all different sizes, which will all take different times to toast.  As halves, the pecans uniformly sized. b) the excess oil will drain off on the cutting board. 


how to dice celery


Here is the trick to dicing celery.

Using your chef's knife, gently, but firmly use the broad side if the blade to tamp the rib of celery flat.

Note: Crush the celery as little as possible. If you over crush the celery, it will begin to disintegrate.
How to dice celery
How to dice celery.


If you are over crushing the celery, it will begin to split apart. As you can see in the photo, there is very little splitting and the rib is largely intact.


Cut the celery into strips
Diced celery


Cross cut the strips to small dice the celery.
cut red grapes in half


Cut all the grapes in half.


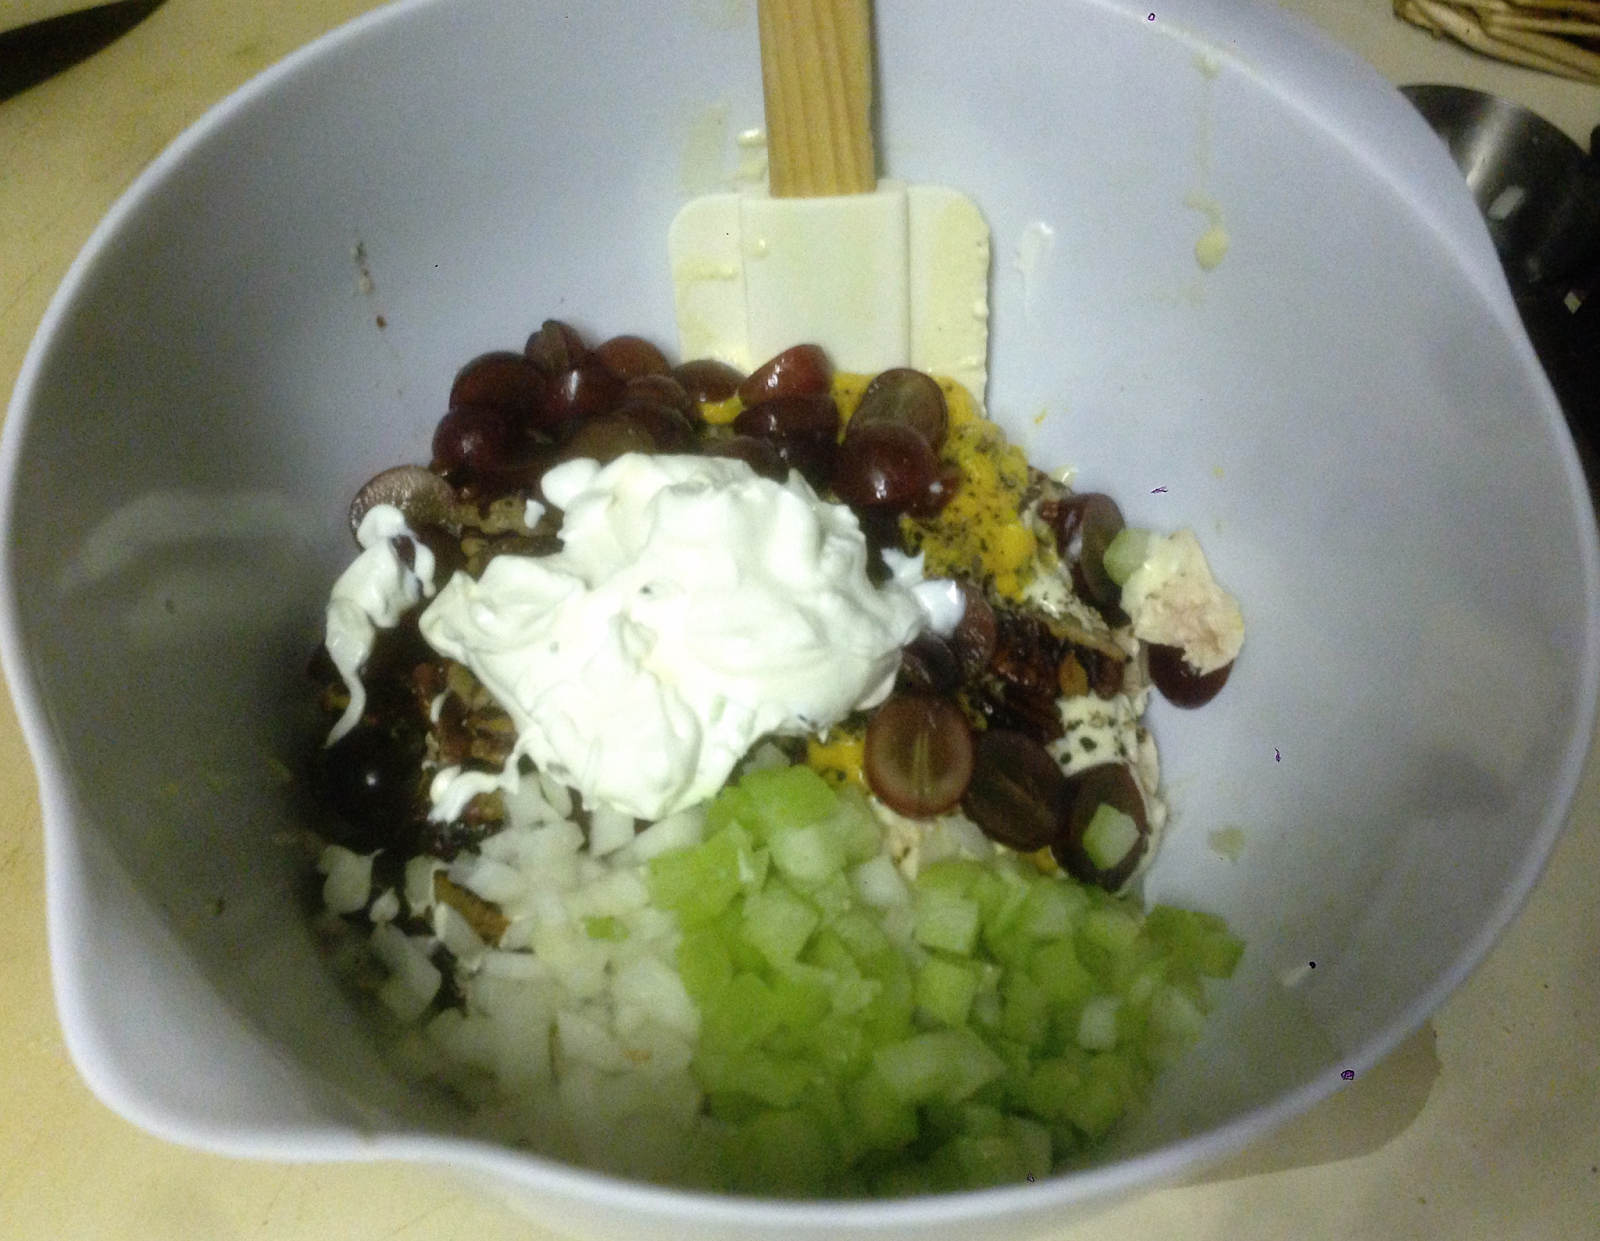
mix all ingredients well in a bowl


Toss all the ingredients in a bowl and mix well with a spatula.

Can be served immediately, but best if left to rest in the refrigerator for at least an hour


Served on Toasted wheat with garden fresh celery tops
Served on Toasted Wheat with Garden Fresh Celery Tops
Server however you like it and enjoy :)

Wednesday, September 4, 2013

Cream of Chicken and Rice Soup Recipe

Finished dish.
This is the 3rd dinner in a series of recipes that use the leftovers of the night before as the main ingredient. This time, we take all the leftover chicken pot pie and we are going to cook it down onto a delicious soup. This is the last of the recipes that follow directly from the last, but this is not the last recipe in the series, because if you remember all the way back to the Chicken Stock and Consommé recipe, we have only used ½ of the chicken meat, thus far. So, the next recipe in the series will be a Chunky Pecan Chicken Salad, and that will finish off a series where we cooked one chicken and had 4 distinct meals.

Note: It is important to realize that these recipes are merely guidelines to follow. They'll taste great as they are, but I encourage you to play with them and make the recipes your own.

Note: It is good practice to read the entire recipe, while paying particular attention to the "Notes", before you try to make the dish, as there are often subtleties that can be easily overlooked, which sometimes, can make all the difference in the world for the outcome. 


Serves 2

Skill Level: Beginner
Prep time to make soup 15-20 minutes.

Ingredients:
  • Chicken Pot Pie leftovers
  • 1 cup cooked rice (just follow directions on the bag)
  • Parmesian cheese
  • cream cheese
  • oregano
  • parsley
  • basil
  • 1 cup of water
  • Salt
  • Pepper

Tools needed:
  • 1 medium rondo
  • 1 wooden spatula for stirring

add chicken pot pie leftovers to a rondo and simmer.


Place the chicken pot pie leftovers in a rondo with 1 cup of water, or chicken stock, and begin to simmer.


add rice


Add the rice.

Note: I had some leftover rice in my fridge, so I used that, so if need be just cook some up, following the directions on the package. 


add cream cheese


When the rice and the pot pie filling have simmered for about 10 minutes, add the cream cheese.


add herbs and spices


When the cream cheese has been fully incorporated, add the herbs and put heat on a low simmer.
Simmering


Cook for about 10 minutes, or until creamy and thick.


Topped with parmesan and parsley


Use ladle to dip into a bowl, top with parmesan and garnish with a little parsley.

Enjoy.


Wednesday, August 28, 2013

Chicken and Dumplings Recipe


A Southern favorite, chicken and dumplings is a staple among the inhabitants of the Golden Isles and this is one of my best attempts at creating a solid recipe for the dish. This is the classic recipe, but feel free to get creative and create something new. For example, you could grind up toasted pecans and add them to the flour when you make your dumplings and have Pecan Chicken and Dumplings. You could add 1 medium boiled potato to the dumpling mix and have Chicken and Gnocchi (These would be pseudo-gnocchis. I will do a true gnocchi recipe at some point next month.). You could add some curry powder to the dumpling dough and then garnish the finished dish with toasted walnuts for a Curried Walnut-Chicken and Dumplings. I could go on and on, as the only limitations are your personal taste and imagination.

Note: If ever I mention a variation of a recipe, feel free to message me to get the particulars of the variation. If the variant is interesting enough, I'll post a full recipe.

This is the second dish in a series of recipes that uses the leftovers of the previous dish as its base. This recipe follows directly from the Chicken Stock and Consommé Recipe, found here: 

http://goldenislescooks.blogspot.com/2013/08/chicken-stock-and-consomme.html.

The recipe that follows directly from this recipe is Chicken Pot Pie filling.

Note: Only my wife and I are eating these meals, so we have plenty of leftovers with the recipes size I am using. If you plan on getting through the complete series of meals, you need to scale all the recipes accordingly, to fit the size of the group, for which you are cooking.


Note: It is important to realize that these recipes are merely guidelines to follow. They'll taste great as they are, but I encourage you to play with them and make the recipes your own.

Note: It is good practice to read the entire recipe, while paying particular attention to the "Notes", before you try to make the dish, as there are often subtleties that can be easily overlooked, which sometimes, can make all the difference in the world for the outcome. 

Makes 6-7 servings.

Skill Level: Beginner

Prep time about 20 minutes, plus one hour rest time between steps.

Cook Time about 30 minutes.

Ingredients:

  • 2½ quarts of chicken stock or 1½ quarts of consommé plus 1 quart water
  • 2 large eggs
  • 2 level cups all purpose flour (APF)
  • 3 teaspoons baking powder
  • ⅔ cup of milk
  • 1 tsp vegetable oil
  • 1 heaping tsp of kosher salt

Tools Needed:
  • Medium/Large rondo
  • 2 medium bowls
  • Whisk
  • 2-3 wooden spoons
  • Measuring cups
  • Measuring spoons
  • Chefs knife
  • Straight edge (back of a knife will do just fine)
  • Rolling pin or unopened wine bottle
  • Large cutting board
  • Food service wrap


To measure out exact cups of flour, or a "level cup", first you want to measure out what is known as a "heaping cup" of flower. Do NOT tamp down.


Placing the cup over your flower container and use a straight edge, like the back of a knife, to scrape the off excess flour. This method makes an exact cup. Again, DO NOT tamp the flour down.


Your cup of four should look like this.

Note: You don't tamp the flour, because doing so will compresses it. You will end up with a lager portion of flour than you need, which could adversely effect your recipe.


Apply the same method the to baking powder and dip out a heaping teaspoon and scrape off the excess with a straight edge.


This is a "level teaspoon".

Dip a heaping teaspoon of kosher salt out and add to the flour


Once you have added all the dry ingredients, use a whisk to ensure that there are no lumps.

Note: You can use a sifter on the flour before you add the other dry ingredients, but I have found, sifters are more trouble than they are worth.  Turns out, it is just easier to use a whisk. 


Add the eggs and the milk in a separate bowl and whisk.


Salt the egg and milk mixture, as eggs and milk do not come from the market seasoned.


Use a wooden spoon to mix the dry and wet ingredients together.


You want a stiff dough. If still tacky to the touch. you may need to add additional flour.


Kneed the dough for about 1-2 minutes. Just enough to make sure all the ingredients are incorporated well.


Place dough in a bowl with the ½ tsp of vegetable oil to coat the ball of dough.
Let dough rest for about an hour.


After an hour has gone by, your dough will be ready to roll out. This is a good time to get your stock or consommé on the stove on medium heat.

Note: If you made consommé, then you will need to stretch it with 1 quart of water. Season to re-intensify the flavor.

Note: If you have made chicken stock, make sure you have 2 ½ quarts. if not, just add a little water, then salt to re-intensify the flavor.


Massage some flour into your cutting board, to help make it non-stick for the dough.

Cut the dough into 6-8 pieces for rolling.

Note: It is better to have smaller pieces, rather than larger pieces. This is because the dough will grow as you roll it and larger pieces will need quite of bit of area to roll out completely. If your find yourself with a piece of dough, which is growing too large, simply cut it in half and work each piece individually. 


So what do you do if you don't have a rolling pin, well, we bring back our trusty, unopened wine bottle.  As we'll see, unopened and opened wine bottles have 1001 uses in the kitchen.
Roll your pasta using this hand grip. Let the weight of the bottle do most of the work. 


You should be regularly, and lightly dust your cutting board, and the piece of dough you are working on, with flour. If you aren't using enough flour, your dough will stick to the pin/wine bottle.

Note: If you are using a wooden rolling pin, then you can massage flour into the grain to help prevent sticking. Rub with flour every time you dust your cutting board.
If your dough sticks, carefully peal it off and dust it on both sides with flour and continue rolling.

Note: The thickness of the dumpling will determine your cooking time. I like to get my dumplings as thick as lasagna noodles. They cook quickly at this thickness and have a nice texture.

Note: In my experience with this recipe, the thinner you roll the dumpling dough, the better they dumplings are.


You can place rolled out dumplings on floured cookie sheets to store out of your way, while your rolling.
Stack all the dumplings up.


Cut in two and stack the halves.


Now cut your dumplings about 1½ inches wide.

Making sure your stock is on the highest heat setting, when your chicken stock/consommé is at a hard rolling boil, drop in one stack of dumplings at a time. Stirring to make sure all the dumplings get separated. Once a boil has been re-reached, add another stack of dumplings. Keep repeating this process until all the dumplings have been added.

Note: if you saved any chicken fat from making the stock, this would be the time to add however much you like to enrich the dish.


Turn the heat down to simmer.

Note: If you are using an electric stove, it may not cool down fast enough to prevent boil over. Place one or two wooden spoons over the pot to prevent boil over while the stock and dumplings cool to a simmer.


Large dice one thigh and one breast, saving the others for a future recipe.
Add the chicken meat to the dumplings and stock.

Cover the chicken and dumplings and simmer on low for between 25-30 minutes.

Note: If you made your dumplings thick, you may need to cook the them 45 minutes or more.

Note: These dumplings do not dissolve away easily, like pasta, which means longer cook times to get them to the desired consistency. The advantage to this particular recipe is, the next day the dumplings will still be dumplings, instead of a congealed mush, like so many other dumpling recipes become. So they are just as good, or even better he next day, as it should be.


Note: If you remove food from the fridge, and its container, DO NOT put the item back in the old container. There are bacteria colonies in the old container that will cause the food to spoil faster, so to extend the life of your food,  place the item in a new, sterile container. 


Note: If you use zipper bags, make sure to force out as much air as possible. As food ages, it releases its essential oils, or in other words, it released its flavor. Once the essential oils hit the air, they become oxidized, or go stale. To minimize this, you minimize the amount of air the item is exposed to.


After the dumplings have cooked for 25-30 minutes, use a spoon to give the food a taste. NEVER use your finger, no matter how great the temptation.

Note: Many chef's have a personal spoon, they keep on them at all times, used specifically for tasting while they cook.


After tasting the chicken and dumplings, adjust the seasoning if necessary.

Serve immediately, but as usual, they will taste better the next day.
Enjoy.