Showing posts with label Sauces. Show all posts

Tuesday, September 17, 2013

How to make Alfredo Sauce

Finished beef ravioli in Alfredo sauce
Alfredo sauce is one of the easiest things to make and the result is so superior to anything you can buy pre-made, there is just no excuse not to make it from scratch. Now, traditional Alfredo sauce is a mixture of butter and parmesan cheese. In the original process, cheese would be added to melted butter, then the pasta would be added, with perhaps a little of the starch water the pasta was cooked in. The pasta, butter and cheese are tossed together until the butter and cheese begin to emulsify. Then more cheese is added at the end, and it is served immediately.

The version I am making today is a more "Americanized" version of the dish, and it is the way the sauce is made in most upscale restaurants. It is a lot easier to get correct and tastes every bit as good.

If you want to make a chicken or seafood Alfredo, cook the meat or seafood in the Sautoir pan, prior to adding the garlic, then follow the recipe as normal. If your using delicate seafood, like scallops and shrimp, you may want to remove them before the sauce is finished, so they do not get over cooked.

Note: It is important to realize that these recipes are merely guidelines to follow. They'll taste great as they are, but I encourage you to play with them and make the recipes your own.

Note: It is good practice to read the entire recipe, while paying particular attention to the "Notes", before you try to make the dish, as there are often subtleties that can be easily overlooked, which sometimes, can make all the difference in the world for the outcome. 

Chicken stock, white wine, heavy cream, parmesan cheese

Makes 4 Servings

Skill Level: Beginner

Prep time 10 minutes, or less.

Ingredients:
  • 1 pint  Heavy Cream (You will not use it all)
  • 1 cup Chicken Stock
  • 1 cup Parmesan Cheese
  • ½ cup White Wine
  • 4 Cloves of Garlic, chopped
  • Pasta of your choice
  • Kosher salt
  • Pepper

Tools needed:
  • 1 Medium/Large Sautoir Pan
  • Chef's knife
  • 1 Large Spoon

Dice garlic


Mince your garlic.
sautée garlic


Sauté the garlic, on low heat, adding a little salt.

Note: if you want chicken or seafood Alfredo, then sauté those items golden brown, on high heat, then remove them from the pan, reduce the heat, add the garlic and proceed as normal. 
Deglaze with white wine


When the garlic has been sweated, crank the heat on high and deglaze the pan with the white wine. Allow to reduce for a 3-4 minutes on the highest heat setting.
Add chicken stock


Add your chicken stock and again, allow to reduce for 3-4 minutes on high heat.
Add your pasta


Add whatever type of pasta you like. I am using frozen beef ravioli I bought at Winn Dixie. Let pasta cook in the wine/chicken stock mixture for 3-4 minutes, on high heat.

Note: Your pasta, whichever you choose should be prepared "al dente" ahead of time. You may even cook your pasta the day before and keep refrigerated until needed. 
Add heavy cream


Cover the pasta with heavy whipping cream and let reduce on high heat.

Note: Just barely cover the pasta in the cream. You DO NOT want the pasta to be swimming in cream, simply covered.
Check the nap the sauce


Using a spoon, check the nape of the sauce.

Note: a sauce which is "nape" will coat the back of a spoon, and a line drawn trough the sauce will remain clear even as the spoon is turned around.

When the sauce has reached a thin nape, it is time to add the cheese, about ⅔ of a cup, reserving the last ⅓ as a topping to garnish the dish.

Note: Whenever your making any kind of sauce, or gravy, checking the nape is the way to make sure you have the perfect thickness every time.
Add parmesan cheese

Once you add the cheese, the sauce is susceptible to burning, so reduce the heat a bit. Stir constantly to fully incorporate the cheese.

Note: The cheese will thicken the sauce considerately, so be careful how much longer you cook the sauce, as you may over thicken the sauce, making it pasty on the pasta.

Note: You want to wait until the sauce is nearly complete before adding the cheese. AVOID adding the cheese early.

Check the nap again


Check the nape again. You should have a nice thick nape now, but it should still be fluid, not pasty.


Note: The trick is to remove the pasta from the heat before the sauce has reached the desired thickness. As the pasta cools, and sits for a minute or two, it will continue to thicken, so if you brought the pasta all the way to the desired thickness in the pan, it will over thicken itself by the time you serve it. 


Serve immediately.

How to make Alfredo Sauce

Garnish with some more parmesan cheese and parsley.

Enjoy!

Wednesday, August 21, 2013

How to make Meatballs - Part 2 - Sauce, Spaghetti, and Parmesan-Garlic Bread


Now that we have our meatballs made, it is time to make the sauce. Since we spent so much time making the meatballs from scratch, it would be sacrilegious to put them in bottled spaghetti sauce, so I recommend making the sauce yourself. You don't have to start from fresh tomatoes to prepare a sauce far superior to the factory made stuff, because you can put an ingredient in your sauce a factory simply can't, and that ingredient is love, which some argue is the most important of all. So lets get started and plate this baby up, I'm starving.


Note: It is important to realize that these recipes are merely guidelines to follow. They'll taste great as they are, but I encourage you to play with them and make the recipes your own.

Note: It is good practice to read the entire recipe, while paying particular attention to the "Notes", before you try to make the dish, as there are often subtleties that can be easily overlooked, which sometimes, can make all the difference in the world for the outcome. 


Serves 4

Skill Level: Beginner


Prep time about 45 minutes.

Cook Time about 3 hours.

Ingredients: 

  • Condensed crushed tomatoes
  • Red wine, Chianti would be preferable, but Merlot or Pino will do fine. (Note: the better the wine you use, the better the sauce. A good rule of thumb is, "If you won't drink it, don't cook with it." I used a bottle of cheap grocery store cooking wine. It was given to me and I preach "Use whatever is on hand" so I used used the wine I had on hand. With grocery store "cooking wine", salt has been added, so it really limits the amount of wine you can add to a given dish and you CANNOT reduce it that much, as it will become too salty.)
  • 1 cup small diced carrots
  • ¾ cup small diced yellow onion
  • 4-6 whole cloves of garlic
  • 1 tlb Dried basil
  • ½ tlb Dried oregano
  • Dried parsley
  • 1 tsp sugar
  • Parmesan cheese
  • ½ loaf Italian bread
  • Melted or Clarified Butter (I will show how to make clarified butter in a future post)
  • Olive Oil
  • Vegetable oil
  • 1 Box of spaghetti
  • Kosher salt
  • Pepper (Note: preferably fresh cracked from a mill)


Tools Needed:
  • 1 Stock pot
  • 1 Sautoir Pan
  • Wooden Spatula
  • Chef's Knife
  • Immersion blender or food processor
  • Pan, Tray, or Cookie Sheet


Small dice your carrots and onions, then mince the garlic, pruning it as we did in Meatball Recipe - Part 1.


Put a few table spoons of olive oil in a Sautoir Pan, heat and add the carrots, seasoning them with salt and pepper. 

Cook the carrots on medium-low heat for about 5 minutes.


Add the onions and season them with salt and pepper.

Sweat the onions, with the carrots, for about 5 minutes.
Add the garlic, seasoning with salt and pepper.

Note: Each time you season, you just add enough salt and pepper for the new ingredient. You are not seasoning the whole mixture each time. You should practice this seasoning method on all foods you cook, as natural foods do not come pre-seasoned from the market. 


Cook for another 5-7 minutes on medium-low heat.

Note: during this process, you want to be stirring the carrots, onions, and garlic around so they do not burn or over brown on any given side.


Deglaze the pan with about ½ cup of red wine and reduce for about 5 minutes.


Add 2 ½ cups of condensed crushed tomatoes, the basil, the oregano, and the sugar. Lightly season the tomatoes with salt and pepper.

Note: If you don't have "condensed crushed tomatoes" and your using regular "crushed tomatoes", you will have to add 3 ½ cups and reduce (simmer) the sauce for about an hour, or until you have about 2 ½ cups remaining, before moving to the next step.


Add one cup of chicken stock and 12 meatballs to the tomato sauce.

Note: Recipe for meatballs can be found here:
Cover and simmer on low heat for between 2-3 hours. The longer you let them cook, the better they are.

About every 10-15 minutes, check to see that you have your heat in the sweet spot for a slow simmer. Once there, check every 20-30 minutes, and give the sauce and stir. 

Note: if your sauce does become to thick to soon, simply thin down with a little water. Don't add to much, or you'll be 'back at square one' with reducing the sauce.

Since I used a bulk sized can of condensed crushed tomatoes, I thought I'd show how to deal with it once you've opened such a large can.

Place 2 ½ cups of condensed crushed tomatoes in appropriately sized freezer bags, removing as much air as possible, and freeze until needed.

Note: I freeze 2 ½ cups, because most recipes I'll be making will use about that amount. So you will choose a portion size that matches your personal needs.


When the sauce is just about done, carefully remove the meatballs and use an immersion blender to puree the sauce smooth. Then return the meatballs and continue cooking.


Note: At this point, it is a good idea to preheat your oven to 350 degrees for the bread and put a stock pot full of water on the stove on high heat.


In a stock pot, bring 2 quarts of water to a hard rolling boil. Add 2 tablespoons of salt.


Measure out your pasta.

1 ¾ inches in diameter is 4 servings, or 8.1 oz.

Note: I am making only 3 servings of spaghetti, as my wife prefers angel hair for her pasta. About 2 oz of angel hair makes a single serving.

Note: While learning to portion out pasta, you can select an amount of pasta, place the pasta perpendicular to a sheet of paper and trace around it. Then see how many portions the diameter you traced made for your family. Keep the paper and the next time you make pasta, you can compare and adjust the amount accordingly. In just a bit, you could have a paper with portion templates to feed any number of people hanging on your fridge. Very handy.


Drop pasta in boiling water.


Immediately stir to make sure the pasta doesn't stick together.


When the pasta is done, pour into a strainer and add oil and mix well, as to coat all the pasta.

Note: Use vegetable oil, as olive oil will sour the pasta faster if you plan to keep it a few days. 

Note: DO NOT run cold water over the pasta, as the pasta is still hot and will absorb water. If you do this you run the risk of over cooking your pasta.


Place pasta on a cookie sheet to cool.

Note: To see why the pasta has been twisted into nests for cooling, refer to "How to Cook Pasta" in the table of contents or click the following link: http://goldenislescooks.blogspot.com/search/label/How%20to%20Cook%20Pasta


Now for the bread.


Half the loaf of bread lengthwise and liberally brush on melted or clarified butter.


Cover the bread with garlic salt, parmesan cheese, and parsley. Place on a sheet pan and bake at 350 degrees until golden and crispy.


When the bread and pasta is ready, cut into 2 inch wide strips.


When the pasta and bread is ready, your meatballs are ready, I mean they should be, they've been cooking nearly 3 hours at this point, it is time to plate the meal.


Serve any way you like.
Enjoy!

Saturday, August 10, 2013

Scaloppini of Tarragon Pork (Poor Man's Veal), over Angel Hair with Lemon Beurre Blanc and Cheesy Broccoli.


This is one of those dishes that is so full of fat that if your mom is deceased, you'll definitely be one step closer to seeing again, but if she is alive, you'll wanna slap her for not making you something so delicious.


Note: It is important to realize that these recipes are merely guidelines to follow. They'll taste great as they are, but I encourage you to play with them and make the recipes your own.

Note: It is good practice to read the entire recipe, while paying particular attention to the "Notes", before you try to make the dish, as there are often subtleties that can be easily overlooked, which sometimes, can make all the difference in the world for the outcome. 

Makes 2-4 servings, depending on weight of chicken.

Skill Level: Intermediate

Prep time about 30 minutes.

Cook Time about 30 minutes.

Ingredients:

  • 4 Thin Cut Pork Chops
  • 2 sticks and 1 tablespoon of sweat cream Unsalted Butter (Note: For butter sauces, some cheaper butters do not work well. Land'O'Lakes is good, but Great Value from Walmart does well also.)
  • 1 cup Buttermilk
  • 1 pack of Broccoli
  • Heavy Cream
  • Cheddar Cheese
  • White Wine (not necessary)
  • Chicken Stick/Bouillon/Base
  • Lemon Juice, fresh or bottled
  • Dried Angel Hair Pasta
  • Dried Tarragon
  • Extra Virgin Olive Oil
  • Vegetable Oil (Not Pictured)
  • Kosher salt
  • Pepper (Note: preferably fresh cracked from a mill)


Tools Needed:
  • Large Stock Pot
  • 1 medium Sauce Pot
  • 1 Sautoir Pan
  • 1 Large (14"-16" Diameter) Frech Grill
  • 1 Gallon Size Heavy Duty Freezer Bag
  • Meat Mallot or Unopened Wine Bottle
  • Pan, Tray, or Cookie Sheet


Cut the zipper off the freezer bag with either a pair of scissors or your chef's knife.


Use your chef's knife to split the left and right seems of the bag.


It should look like this when done. You may want to make a few of these if your using a meat mallet as the mallet has a tendency to damage the bags.


Using your petty knife (or paring knife), clean the pork chops, removing the bones, gristle, and fat.


Note: Save the bones and fat and put them in a appropriate sized freezer bag and store in your freezer. When we build up enough, over time, we will make a stock from the bones and lard from the fat.


Bring water for the angel hair to a boil. Add some salt, but only after the water has come to a boil. The reason for this is, salt is corrosive to your cookware, pitting the metal, which can eventually cause a leak. Bringing the water to a boil allows the salt to dissolve instantly, minimizing its corrosive effects.


The best way to measure out portions of pasta is to grab a bunch tight like this and see its diameter. About 1½ inches in diameter, or 6.2 ounces, will feed 3 people (1 inch in diameter will feed 2, or 4.1 ounces, and 1 ¾ inches in diameter will feed 4, about 8.1 ounces). The reason I am making 3 portions is so that my wife can have the third portion for lunch tomorrow.

Note: When measuring, or eyeballing, the dosimeter of the pasta, make sure you make the pasta circular shaped, unlike the elliptical shape in he photo. After years of cooking, you no longer need the diameter, as you can just feel the portion size.


Drop the pasta in water that is at a hard rolling boil.

Note: it is not necessary to break your pasta in half. If a  portion of the pasta is out of the water, don't worry, in a few moments, the pasta will become malleable enough to fold on itself and fully submerge.


Stir immediately to prevent the pasta from clumping together. You only need stir long enough to see that all the pasta is separated.
Do not add oil to the water, as it does nothing but waste your oil. If you want to keep your water from boiling over, you can use a large pot, like I have, where boil over is not possible. If you don't have a large pot, you can keep boil over from happening by controlling the heat. When the water returns to a rolling boil, after the pasta is added, begin reducing the heat to the lowest setting you can, and still maintain a boil. Placing a wooden spoon over the pot can also help. The spoon effectively pops the bubbles and keeps the boil over under control if you don't get the heat turned down low enough.


While the pasta is cooking, start to pound the pork, by placing a pice of he meat in-between the plastic flaps we made earlier. 


So, what do you do if you don't have a meat mallet? Well, if you just happen to have a unopened wine bottle, then your good to go.


Gently pound the pork as paper thin as you can get it.

Note: The wine bottle's rounded edge can cut through the meat, so be gentle as you pound, or you'll find yourself with a lot of little pieces when your done.


Pound the pork from different directions, so that you can get the meat as evenly thin as possible. 


When done with a piece, carefully peel it off the plastic and roll it up, so that it takes up less room as we work on the other pieces.


Note: You can put the pork in a container and store like this for several days.


If you use one hand for your bottle of wine and the other to handle the meat, your bottle of wine will remain pristine and can be saved for some other occasion.


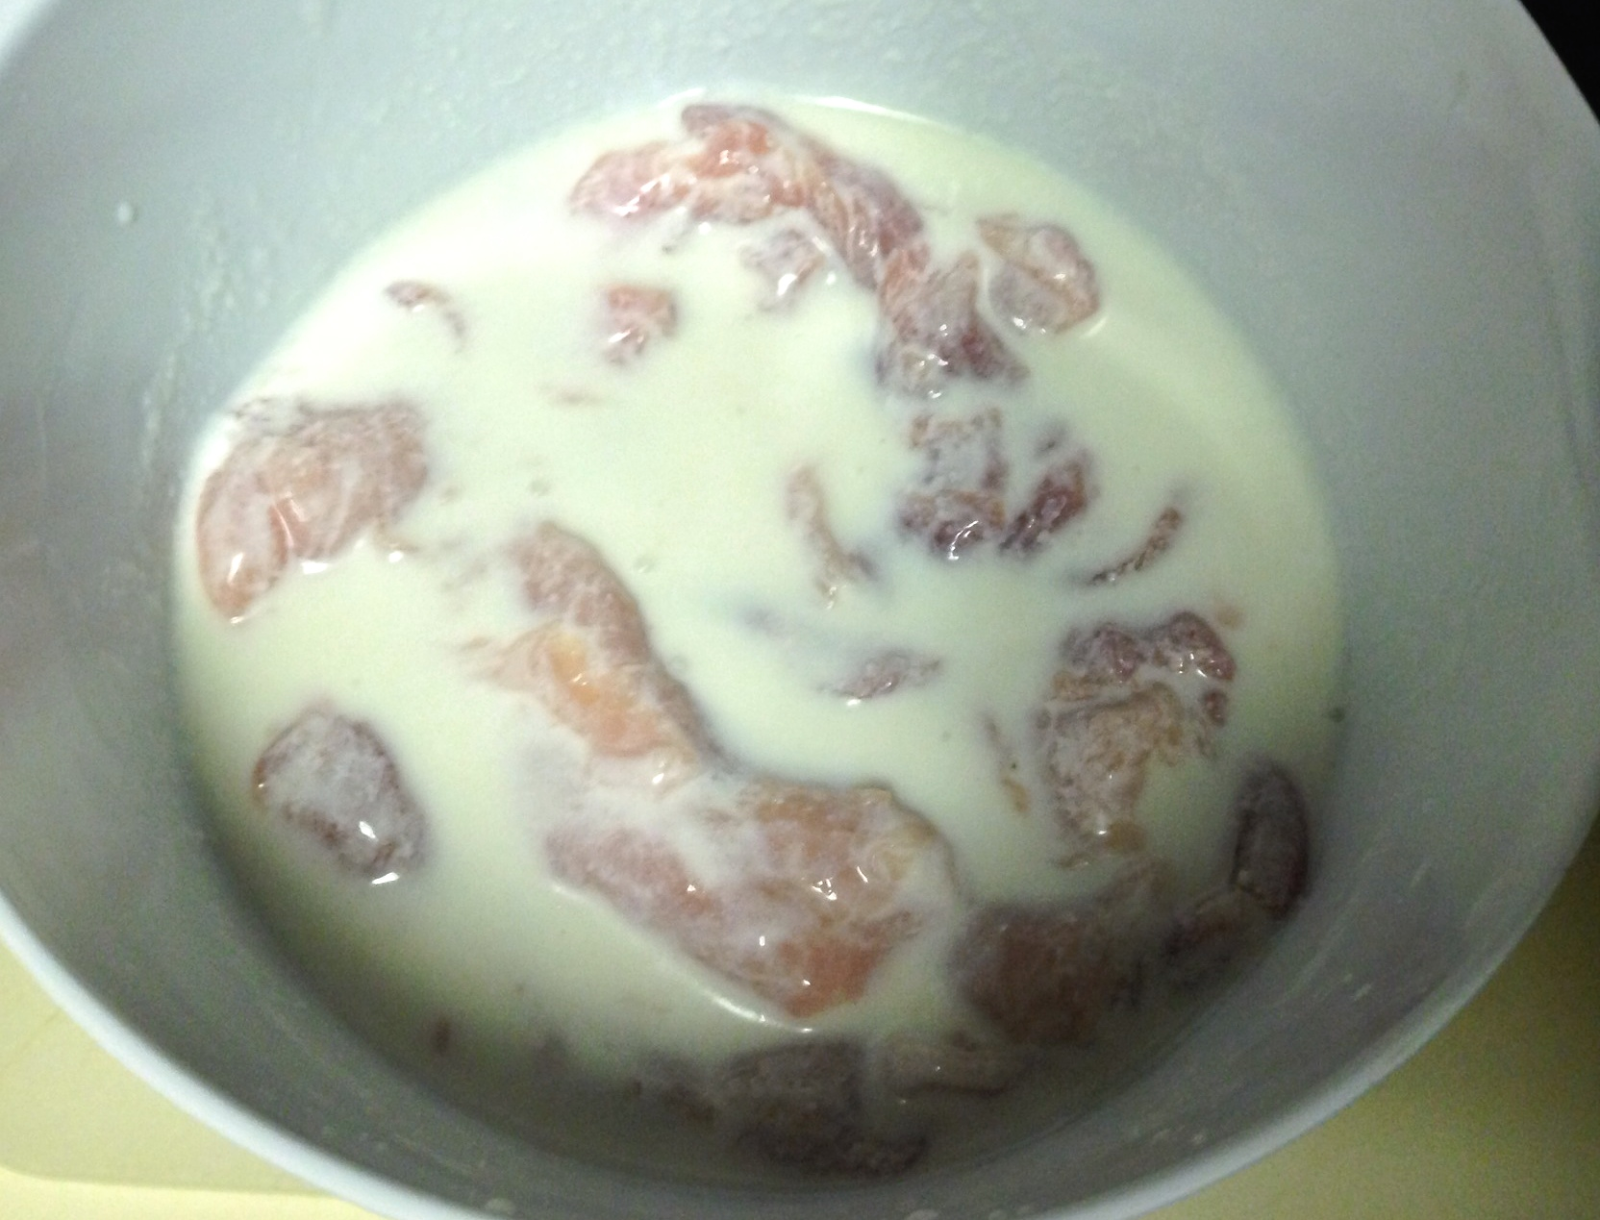
Here is where the "Poor Man's Veal" comes in. Soak your pork in butter milk for about an hour or two. The enzymes in the buttermilk have an effect on the pork, as to give it a very similar flavor and texture as veal.


When the pasta is done boiling, stain and pour some vegetable oil over the pasta.

Note: DO NOT rinse the pasta under cold water, as the pasta is still hot and cooking, and if you run water over it, you run the risk of your pasta over cooking.


Give the hot pasta a good stir, to mix the oil well, and then place on a pan, tray, or cookie sheet to cool.

Note: Do not use olive oil if you want to keep the pasta for a few days, as olive oil can sour the pasta quickly. Use vegetable oil instead, and you'll find your pasta can last 4-6 days in the fridge.


Pile the pasta up in nests that are the portion size you want to serve and let cool.


After the pasta has cooled, the nests that we made will be lightly bound together, which makes handling them easy.


You can place the nests in a container until you are ready to use them.

Note: The beauty of making the nests are, if you want to make many servings of pasta ahead of time, then since the nests are individual, you can easily grab out however many portions of pasta you need to fix the meal at hand. 
After the pork has soaked, lay out and salt, pepper, and cover with tarragon.


When prepping the broccoli, cut the florets off. Then, using a bird's beak paring knife (or regular paring knife), peal the stocks. 1/5 of the total edible part of he plant is the stock, and in my opinion, it is the tastiest 1/5, so don't just throw it away.

Note: You can use a potato peeler, but you'll still need to do a little knife work to get the stalks completely peeled.


Once you have peeled off the skin, you can easily see how far up the stalk has dried from the farm cut. Remove the dried end.


The stalks should look like this when peeled.


Slice the stalks on a bias, about ¼-½ inch thick or roughly the thickness of the florets you cut previously.


Use the pot from the pasta and bring more water to a rolling boil. Heavily salt. You want to water to have a slightly salty flavor. This not only flavors the broccoli internally, but salt also keeps the chlorophyll from leaching out into the water, keeping the broccoli bright green.

Note: This works for all green veggies that you might want to blanch: green beans, haricot verts (French green beans), Chinese long beans, asparagus, broccolini, rapini, etc...


Drop the broccoli into the boiling water. Cook until tender.

Note: If the color starts becoming grey, it is overcooked. If all the dark green florets begin braking off , the broccoli is over cooked. You want to still be a little firm when you remove it from from the boiling water.


Note: Before you blanch anything, it is always a good idea to have the ice water ready, at the wait.


Strain the broccoli when done.


Dump into the ice water and carefully agitate to cool the broccoli off as quickly as possible.


You want the broccoli to soak in water for as brief a time as possible, so the moment all the broccoli is cool, strain again. If ice cubes remain, run cold water over the broccoli, which will quickly melt the ice.


In a sauce pot, heat some chicken stock or water mixed with bouillon or base.


So, when we go to get our cheddar cheese, this is what we find. Well, have no fear, there is plenty of good cheese here. 


Simply use your chef's knife and remove all six sides and discard. What is leftover is perfectly good cheese.


Put a few tablespoons of olive oil in a large French Grill and get smoking hot.

Add the pork.


Bring the chicken stock to a hard rolling boil and reduce to intensify the flavor. 


Add about ½ cup of heavy whipping cream. Bring back to a boiled and begin reducing again.


Flip the meat when well browned on one side.


Grate the cheese


Add the cheese to the heavy cream and chicken stock reduction and reduce to a simmer.


Then take about tablespoon of cornstarch and a few tablespoons of cold water and mix together. Add the the cream and cheese mixture a little at a time. You want the sauce to have a nice nape, not to thick as to be pasty, but not so thin it will run all over the plate.


After the meat is removed from the French grill, pat any excess oil out, as any oil can break the sauce we are about to make.


Deglaze the pan with some white wine, if you have it, or some chicken stock  or some water mixed with bouillon.


After the French grill has been deglazed (all the good flavor has been dissolved into the deglazing liquid), pour into a sautoir pan to finish the sauce. Add about ¼ cup lemon juice and return to a hard boil to reduce a bit.


Cube up 2 sticks of cold butter.

Note: When making beurre blanc, you want to use the coldest butter possible, as this lessons the chance of the sauce breaking. 


In a sauté pan, melt ½ tablesppon butter, browning just slightly, to bring out a little nutty flavor. This is a separate pat of butter from what we cubed for the beurre blanc sauce.


Add the broccoli, salt, and pepper. Flip until warmed through. 


When the de-glazing liquid is reduced by half, begin adding the cold butter, a little at a time.

Note: Once you start adding the butter, you cannot stop whisking it until all the butter is completely incorporated, or the sauce will break.


Once all the butter is in, keep whisking until all the butter has 100% melted.
If you have done it correctly, you will have a nice thick butter sauce, or beurre blanc.

Note: If you have made the beurre blanc correctly, then you will be able to reduce the sauce at a hard boil, without it breaking. Just make sure not to reduce to much, as that will break the sauce.

Note: You can warm the pasta up by sautéing in some butter, or dipping a basket of the pasta in boiling water, or you can serve it room temp, like I did.


To serve, place a nest of the pasta on the plate. Fan some of the pork around the pasta. Use the butter sauce for the pasta and the meat. Place the broccoli next to the meat and pasta and ladle the cheese sauce over.


Enjoy.