Thursday, September 19, 2013

How to Eliminate Fruit Flies from your Kitchen without Pesticides.

This is a relatively simple process. 

You will need 

• Plastic 2 liter bottle 

• Some BBQ sauce.

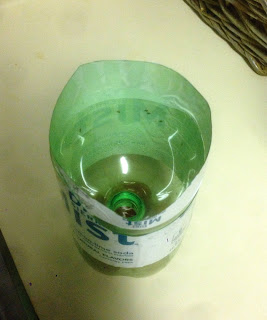
2 liter bottle and some BBQ sauce2 liter bottle and some BBQ sauce


Cut the 2 liter bottle where bottom part is 2/3rds the height of the uncut bottle. Pour about ¼ cup of BBQ sauce in the bottom of the bottle.  Invert the neck of the bottle and insert into the bottom, making sure you have a tight fit. I have found that having the mouth of the bottle about 1 inch from the bait is the most effective configuration. That's it. Just leave it out on the counter for several days.

Note: I use BBQ sauce because I have found that it is the best bait. Sugar water seemed to be completely ineffective in attracting the fruit flies into the bottle. 

Note: You may want to make several of these, throwing away what you have caught the day before and replacing your trap with a fresh one.

Note: You can also use this method to trap house flies. Sugar water seems to work on house flies, but oddly enough, they really seem to love wasabi (Japanese Horseradish, usually found in powdered form in the international food section of your local grocery store. Simply add water and make a soupy paste to put into your bottle). 

2 liter bottle and some BBQ sauce

 Happy Hunting :)

Tuesday, September 17, 2013

How to make Alfredo Sauce

Finished beef ravioli in Alfredo sauce
Alfredo sauce is one of the easiest things to make and the result is so superior to anything you can buy pre-made, there is just no excuse not to make it from scratch. Now, traditional Alfredo sauce is a mixture of butter and parmesan cheese. In the original process, cheese would be added to melted butter, then the pasta would be added, with perhaps a little of the starch water the pasta was cooked in. The pasta, butter and cheese are tossed together until the butter and cheese begin to emulsify. Then more cheese is added at the end, and it is served immediately.

The version I am making today is a more "Americanized" version of the dish, and it is the way the sauce is made in most upscale restaurants. It is a lot easier to get correct and tastes every bit as good.

If you want to make a chicken or seafood Alfredo, cook the meat or seafood in the Sautoir pan, prior to adding the garlic, then follow the recipe as normal. If your using delicate seafood, like scallops and shrimp, you may want to remove them before the sauce is finished, so they do not get over cooked.

Note: It is important to realize that these recipes are merely guidelines to follow. They'll taste great as they are, but I encourage you to play with them and make the recipes your own.

Note: It is good practice to read the entire recipe, while paying particular attention to the "Notes", before you try to make the dish, as there are often subtleties that can be easily overlooked, which sometimes, can make all the difference in the world for the outcome. 

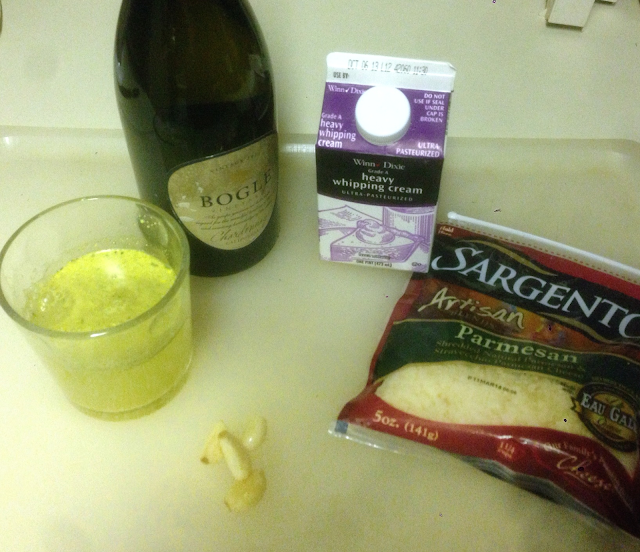
Chicken stock, white wine, heavy cream, parmesan cheese

Makes 4 Servings

Skill Level: Beginner

Prep time 10 minutes, or less.

Ingredients:
  • 1 pint  Heavy Cream (You will not use it all)
  • 1 cup Chicken Stock
  • 1 cup Parmesan Cheese
  • ½ cup White Wine
  • 4 Cloves of Garlic, chopped
  • Pasta of your choice
  • Kosher salt
  • Pepper

Tools needed:
  • 1 Medium/Large Sautoir Pan
  • Chef's knife
  • 1 Large Spoon

Dice garlic


Mince your garlic.
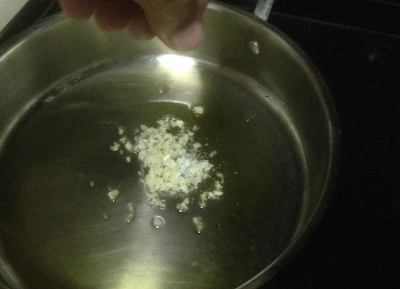
sautée garlic


Sauté the garlic, on low heat, adding a little salt.

Note: if you want chicken or seafood Alfredo, then sauté those items golden brown, on high heat, then remove them from the pan, reduce the heat, add the garlic and proceed as normal. 
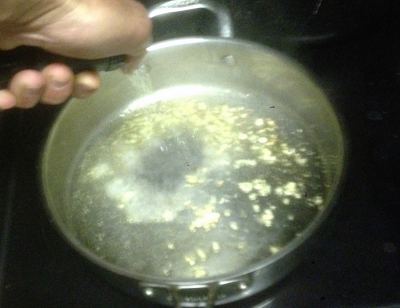
Deglaze with white wine


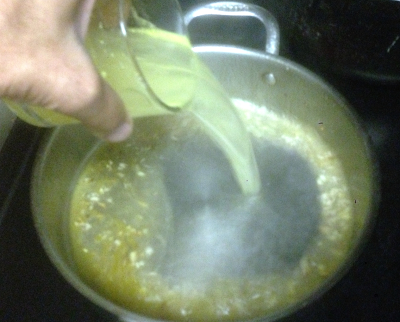
When the garlic has been sweated, crank the heat on high and deglaze the pan with the white wine. Allow to reduce for a 3-4 minutes on the highest heat setting.
Add chicken stock


Add your chicken stock and again, allow to reduce for 3-4 minutes on high heat.
Add your pasta


Add whatever type of pasta you like. I am using frozen beef ravioli I bought at Winn Dixie. Let pasta cook in the wine/chicken stock mixture for 3-4 minutes, on high heat.

Note: Your pasta, whichever you choose should be prepared "al dente" ahead of time. You may even cook your pasta the day before and keep refrigerated until needed. 
Add heavy cream


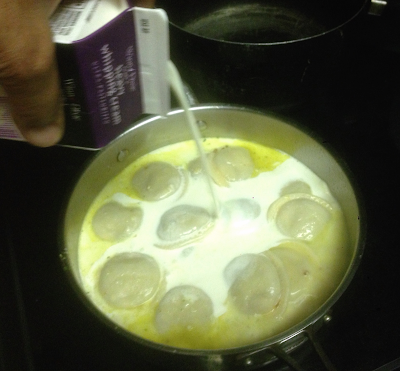
Cover the pasta with heavy whipping cream and let reduce on high heat.

Note: Just barely cover the pasta in the cream. You DO NOT want the pasta to be swimming in cream, simply covered.
Check the nap the sauce


Using a spoon, check the nape of the sauce.

Note: a sauce which is "nape" will coat the back of a spoon, and a line drawn trough the sauce will remain clear even as the spoon is turned around.

When the sauce has reached a thin nape, it is time to add the cheese, about ⅔ of a cup, reserving the last ⅓ as a topping to garnish the dish.

Note: Whenever your making any kind of sauce, or gravy, checking the nape is the way to make sure you have the perfect thickness every time.
Add parmesan cheese

Once you add the cheese, the sauce is susceptible to burning, so reduce the heat a bit. Stir constantly to fully incorporate the cheese.

Note: The cheese will thicken the sauce considerately, so be careful how much longer you cook the sauce, as you may over thicken the sauce, making it pasty on the pasta.

Note: You want to wait until the sauce is nearly complete before adding the cheese. AVOID adding the cheese early.

Check the nap again


Check the nape again. You should have a nice thick nape now, but it should still be fluid, not pasty.


Note: The trick is to remove the pasta from the heat before the sauce has reached the desired thickness. As the pasta cools, and sits for a minute or two, it will continue to thicken, so if you brought the pasta all the way to the desired thickness in the pan, it will over thicken itself by the time you serve it. 


Serve immediately.

How to make Alfredo Sauce

Garnish with some more parmesan cheese and parsley.

Enjoy!

Sunday, September 15, 2013

How to Prepare a Melon

Diced Melon

For those of you new to cooking, you may not know the easiest way to clean a melon and since most melons can be cleaned this exact same way, I thought I'd toss up this quick little lesson.

Once you have diced your melon, you can serve as is or you can toss with other fruits for a salad, or you can through the melon into a food processor and purée to make melon soups or fresca drinks.

Melon, knife, and spoon

All you need is a melon, in this case a cantaloupe, a chef's knife and a large spoon.

Cut the top and bottom off mellon


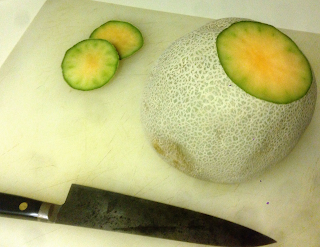
Begin by cutting the ends off. Just enough to allow you to stand the melon on end.
Peel skin off melon


Use your chef's knife to shave off the skin and rind, being careful not to remove any meat.
peeled melon


Once all the skin and rind has been trimmed away, go around your melon and make sure you did not miss any rind.
remove seeds from mellon


Use your spoon to scrape out the seeds.
quater melon


Quarter the melon.
cut melon into 12 pieces


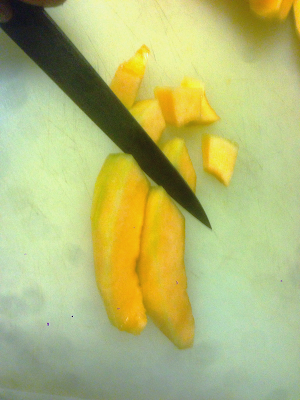
Them cut the quarters into thirds, giving you 12 even strips, about an inch thick in the middle.

Note: If you mellon is very large, you may need to cut into 16 wedges, and conversely, if your melon is very small, cut into eighths.
Dice melon


Large dice the strips, 1"x 1" cubes
How to Prepare a Mellon

Enjoy

Friday, September 13, 2013

Cooking Tip of the Day: Steaks

When preparing steaks, remove from the refrigerator 1-2 hours ahead of time, as you want your steak to be at room temperature when you place it on the grill or in a hot pan.

Rub the steak with extra virgin olive oil and salt. As the steak rests, the salt will penetrate the meat and will act like a tenderizer.

Always cook your steaks with high heat. If your grilling, you want your coals about 2 inches below the grill.

When cooking your steak to the desired temperature, strop 1 temperature short of what you want. For example, if you want your steak medium, remove the steak from the grill/pan when the steak is medium rare. The reason for doing this, is you want to rest your steak for 5-10 minutes, depending on the cut, and as it rests, your steak will continue to cook. Allowing your steak to rest is called "carry over cooking" and the principal is this, when your cooking with high heat, moisture has a tendency to run away from it. In the case of a steak, all the juices get forced to the center. Thus, if you remove a steak from the the heat, and cut it, you will notice 2 things:

a) juices will spill out onto the plate, since the center of the steak is over saturated, and'

b) the outer ¼ inch of the steak will be more or less well-done.

By allowing the steaks to rest, the moisture in the middle if the steak will redistribute itself and when you cut the steak, you will now notice the steak will be uniformly cooked from top to bottom.

Sunday, September 8, 2013

Personal Thoughts

As many of you may know, I an a senior in college pursuing a degree in Pure Mathematics. 

Due to tests in Real Analysis I and Abstract Algebra I, in the coming week, there will most likely be no new recipes.


But once my schedule levels out, the recipes will rerun. 

And thanks to all those who support Golden Isles Cooks and I hope to see you all real soon.

Your faithful Chef,


Dayton Ireland

Friday, September 6, 2013

Chunky Pecan Chicken Salad Recipe

Served on Toasted Wheat
This is the 4rd meal in a series of recipes that were derived from one another, but this time, instead of using leftovers, we are going to use the rest of the chicken meat from the Chicken Stock and Consommé recipe. Within this series, we have made 4 meals, for 2 persons, from a single chicken. This is why doing a series of meals in this fashion, not only makes preparing meals easier, it can also be friendlier to your wallet.

Feel free to play around with this recipe and make changes to suit your tastes. For example, you could add curry, change the pecans to walnuts, and add some white raisins and have a Curried Chicken Salad. You could add apples and cashews instead of grapes and pecans. You could use a food processor to pulse grind the meat for a smoother style chicken salad. You could use smoked chicken, mayo, mustard, onions, celery, and some BBQ spices and have a Smoked Chicken Salad. You are only bound by you imagination. 

Note: It is important to realize that these recipes are merely guidelines to follow. They'll taste great as they are, but I encourage you to play with them and make the recipes your own.

Note: It is good practice to read the entire recipe, while paying particular attention to the "Notes", before you try to make the dish, as there are often subtleties that can be easily overlooked, which sometimes, can make all the difference in the world for the outcome. 

ingredients for chicken salad
Makes 4 Sandwiches

Skill Level: Beginner
Prep time 10 minutes, or less.

Ingredients:
  • ½ cup chicken (roughly 1 breast and 1 thigh)
  • ½ cup celery, small dice
  • ¼ cup yellow or Vidalia onion, small diced
  • ¾ cup red seedless grapes, cut in ½
  • ½ cup toasted and salted pecan halves, lightly chopped
  • ½ cup mayonnaise 
  • ¼ cup sour cream
  • 1 tablespoon yellow mustard
  • 1 tablespoon lemon juice
  • ¼ teaspoon kosher salt
  • ¼ teaspoon pepper

Tools needed:
  • 1 medium bowl
  • Chef's knife
  • 1 rubber spatula for stirring

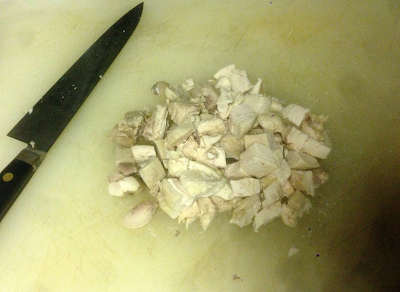
dice chicken


Large dice the chicken meat.
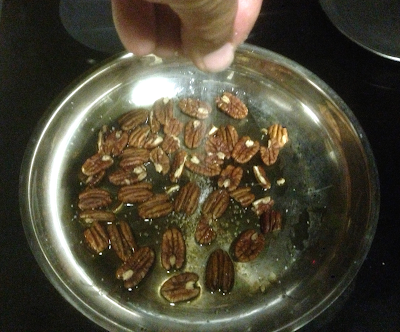
toasting pecans


In a sauteuse pan, heat a tablespoon of olive oil and add the pecan halves and a ½ teaspoon of salt. Using medium to high heat, toast the pecans, flipping them often, to keep them from burning.
chopped toasted pecans
 When the pecans have toasted, place them on a cutting board and lightly chop.

Note: I toast the pecans whole and then chop them, instead of the other way around. I do this for two reasons: a) if you chop them ahead of time, you will have pieces of all different sizes, which will all take different times to toast.  As halves, the pecans uniformly sized. b) the excess oil will drain off on the cutting board. 


how to dice celery


Here is the trick to dicing celery.

Using your chef's knife, gently, but firmly use the broad side if the blade to tamp the rib of celery flat.

Note: Crush the celery as little as possible. If you over crush the celery, it will begin to disintegrate.
How to dice celery
How to dice celery.


If you are over crushing the celery, it will begin to split apart. As you can see in the photo, there is very little splitting and the rib is largely intact.


Cut the celery into strips
Diced celery


Cross cut the strips to small dice the celery.
cut red grapes in half


Cut all the grapes in half.


mix all ingredients well in a bowl


Toss all the ingredients in a bowl and mix well with a spatula.

Can be served immediately, but best if left to rest in the refrigerator for at least an hour


Served on Toasted wheat with garden fresh celery tops
Served on Toasted Wheat with Garden Fresh Celery Tops
Server however you like it and enjoy :)

Wednesday, September 4, 2013

Cream of Chicken and Rice Soup Recipe

Finished dish.
This is the 3rd dinner in a series of recipes that use the leftovers of the night before as the main ingredient. This time, we take all the leftover chicken pot pie and we are going to cook it down onto a delicious soup. This is the last of the recipes that follow directly from the last, but this is not the last recipe in the series, because if you remember all the way back to the Chicken Stock and Consommé recipe, we have only used ½ of the chicken meat, thus far. So, the next recipe in the series will be a Chunky Pecan Chicken Salad, and that will finish off a series where we cooked one chicken and had 4 distinct meals.

Note: It is important to realize that these recipes are merely guidelines to follow. They'll taste great as they are, but I encourage you to play with them and make the recipes your own.

Note: It is good practice to read the entire recipe, while paying particular attention to the "Notes", before you try to make the dish, as there are often subtleties that can be easily overlooked, which sometimes, can make all the difference in the world for the outcome. 


Serves 2

Skill Level: Beginner
Prep time to make soup 15-20 minutes.

Ingredients:
  • Chicken Pot Pie leftovers
  • 1 cup cooked rice (just follow directions on the bag)
  • Parmesian cheese
  • cream cheese
  • oregano
  • parsley
  • basil
  • 1 cup of water
  • Salt
  • Pepper

Tools needed:
  • 1 medium rondo
  • 1 wooden spatula for stirring

add chicken pot pie leftovers to a rondo and simmer.


Place the chicken pot pie leftovers in a rondo with 1 cup of water, or chicken stock, and begin to simmer.


add rice


Add the rice.

Note: I had some leftover rice in my fridge, so I used that, so if need be just cook some up, following the directions on the package. 


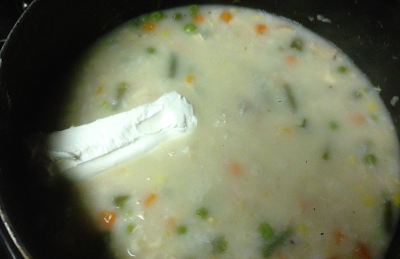
add cream cheese


When the rice and the pot pie filling have simmered for about 10 minutes, add the cream cheese.


add herbs and spices


When the cream cheese has been fully incorporated, add the herbs and put heat on a low simmer.
Simmering


Cook for about 10 minutes, or until creamy and thick.


Topped with parmesan and parsley


Use ladle to dip into a bowl, top with parmesan and garnish with a little parsley.

Enjoy.


Monday, September 2, 2013

Quick Chicken Pot Pie Filling


Finished pot poies

Since I have already done a chicken pot pie recipe, I'll keep this one brief. I have also simplified this version of the recipe by eliminating the bottom crust.

This is the continuation of a series of dishes, where the main components of the dish comes from the leftovers of the previous dish. Doing meals in series allows you to make several dinners with the bulk of your effort put into the 1st dinner, then the rest almost come for free. 

The first recipe in this series was Chicken Stock and Consommé,

http://goldenislescooks.blogspot.com/2013/08/chicken-stock-and-consomme.html

which was followed by Chicken and Dumplings,

http://goldenislescooks.blogspot.com/2013/08/chicken-and-dumplings-recipe-follows.html

Now we are going to take the dumpling leftovers and make a quick chicken pot pie filling, for a great homemade dinner that takes about 15 minutes of prep time.

The recipe that will follow this recipe is Cream of Chicken and Rice Soup.

ingredients for the recipe Quick Chicken Pot Pie Filling

Note: It is important to realize that these recipes are merely guidelines to follow. They'll taste great as they are, but I encourage you to play with them and make the recipes your own.

Note: It is good practice to read the entire recipe, while paying particular attention to the "Notes", before you try to make the dish, as there are often subtleties that can be easily overlooked, which sometimes, can make all the difference in the world for the outcome. 

Makes 2 servings, plus some leftover.

Skill Level: Beginner


Prep time: about 2 minutes, i.e. pull everything out and place on the stove.

Cook Time: about 20-25 minutes for the filling and 40-45 minutes for the crust, plus one hour rest time between steps.

Ingredients:
  • Left over chicken and dumplings
  • Frozen Mixed Vegetables
  • 1 sheet of puff pastry (not pictured)
  • 1 egg  (not pictured)
  • 1 cup of water
  • Black pepper, preferably fresh cracked.
  • Kosher salt

Tools Needed:
  • Medium Rondo
  • Wooden spatula for stirring
  • Measuring cup
  • Petty or paring Knife
  • Brush for egg wash
  • 1 Fork
Preheat oven to 350 degrees.

Rondo with filling
filling


Place the leftover chicken and dumplings in a rondo with about a cup of water. Simmer until the dumplings have broken down and have begun to thicken the mixture.


Add the frozen veggies and cook for about 10 more minutes, or until the filing has become fairly thick.

Note: The dumplings will act as the thickening agent, as they break down and release their starch into the mixture. Rice and pastas are commonly used as thickening agents in soups and fillings.

Allow to cool for about an hour.
Puff pastry puff pastry and egg wash


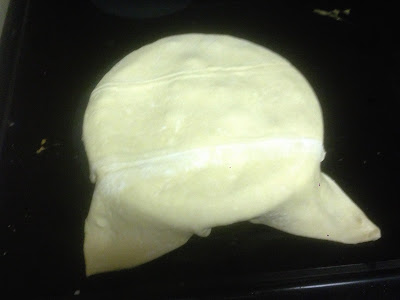
Place cooled filling in a oven safe bowl. Then top with a sheet of puff pastry.

Note: Most earthenware or china bowls will be oven safe for this type of recipe.

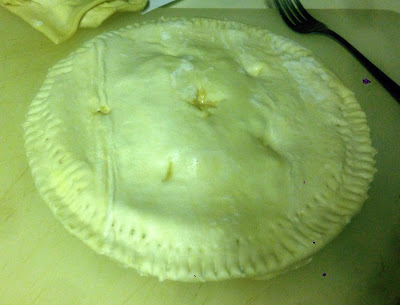
Use a knife and cut the excess pastry off the edge of the bowl and cut vent slits. Use a fork to crimp the circumference.


Note: It is best to cut under the edge of he bowl, instead of right on the edge of the bowl. This way you have a small lip of pastry wrapped around the edge of the bowl, better securing the top crust.

Puff pastry and eg wash

Paint a thin, even coat of the egg wash over the tops of the pies. 

puff pasty and egg wash


Note: Make sure the egg is painted on evenly, or it will make dark streaks on the thicker spots.

Place the pies on cookie sheets and place in a 350 degree oven.

Baking tips

About 25 minutes in, check the pies, cut off any unruly pastry that you missed earlier.

Note: If your oven has hot spots, it my be necessary to rotate the pies every 20 minutes so they brown evenly.
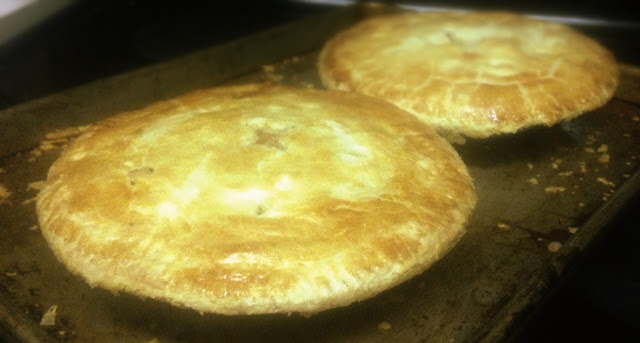
Quick Chicken Pot Pie Filling

Approximately 45 minutes later, the pies will look like this.

Allow to cool for 10 minutes before eating.

Note: if you are going to proceed to the next recipe in the series, make sure you save all the chicken pot pie leftovers, including any unused pie filling and any uneaten portions (When you are done eating your pie, if you have any filling and/or crust left in your bowl, simply scrape the remainder back into the rondo you prepared the filling in, and place in the refrigerator for the next recipe. 

Enjoy